QuietStove.com

Saturday, March 25, 2017

The G-Works R1 Gas Saver – Refilling Backpacking Canisters II

Ever notice how expensive the small canisters of gas are?  But the big canisters are cheap by comparison (per gram).  Wouldn't it be nice to pay the big canister rate for small canisters?  Well, you can – with a G-Works Gas Saver adapter.
A G-Works R1 Gas Saver adapter can help one avoid paying the "convenience charge" of small canisters.
I recently walked into a retailer and saw canister gas for $4.95 for 100 grams. Easy math:  $4.95 for 100 grams works out to $0.0495 per gram; that's basically a nickel (five cents) per gram of fuel. OK, so a nickel isn't that much, but why pay more?
A 100 gram canister of gas often retails for $4.95.  That's a nickel per gram.
You know that gas is so much cheaper if you buy the big 440 or 450 g canisters.  For example, at Walmart, I recently saw 440 g canisters for $7.72 or $0.0175 per gram.  That's basically two cents per gram, less than half the price of gas when sold in the 100 gram canister.
440 gram canisters for sale for $7.72
Well, I suppose five cents a gram isn't the end of the world, but wouldn't it be nice if you could buy gas for two cents a gram but in the small canisters?  I mean, with the 440 g size, who wants to carry those big, heavy beasts of a canister around for weekend's worth of hiking?  Not me, thank you.

Well, you can pay the big canister rate for small canisters.  Yes, that's right, you can.  You just need a G-Works R1 Gas Saver.  The G-Works Gas Saver basically hooks up two canisters.  When your 100 or 110 g canister runs out, you refill from a 440 or 450 g canister.  Thus, you pay the 440 g rate for the convenient 100 or 100 g size canister.

Custom Filling
You can also custom fill canisters to exactly the amount of gas you need for a given trip.  Say you need approximately 12 ounces of fuel (about 340 g) for a given trip.  Well, gas is only sold in the US in approximately 4, 8, and 16 ounce sizes (roughly 110, 220, and 450 grams respectively).  If you want 12 oz of fuel, you have to buy 16 oz and carry an extra quarter pound of dead weight.  Yes, you could flare off the gas, but that's kind of a waste.

Or, you could carry one 8 oz (about 230 g) and one 4 oz (about 110 g) canister, but remember a 100 g canister of gas weighs 200 g full and 100 g when empty.  In other words, the canister weighs as much as the fuel.  So, by carrying two canisters, you're carrying a lot more steel, and you're really not saving much weight by carrying one 4 oz and one 8 oz canister when compared to carrying a single 440 or 450 g canister.

For example, I took some full canisters, and put them on a scale:
Size Weight when full (g) Weight when full (g)
4 oz 213
8 oz 376
16 oz 622 Difference
Total 589 622 33

The difference between carrying 16 oz of fuel vs. 12 is only 33 g (1.2 oz) because of the weight of the canisters.  The weights between brands of canisters may vary, but these weights should be illustrative.  So, carrying 4 oz less in fuel saves me only about 1 oz in actual weight because of those darned steel canisters.

But what if I custom fill an empty 16 oz canister with 12 oz of fuel?  The weight of the canister does not change, and any reduction in fuel equates to an actual one-to-one reduction in weight.  If I fill with 4 oz less of fuel (113 g), I carry 4 oz less pack weight.  Yes, a bit of fuss to save a quarter pound, but remember that if the average backpacker (who carries something like 80 to 100 items in their backpack) could save just 2 oz on average per item, their pack would weigh on the order of ten pounds less overall.  Ounces are worth shaving wherever you can.  And if you're already using the G-Works adapter to pay the 440 g rate for 110 g canisters, why not not save a few ounces of pack weight while you're at it?

Caution!
Refilling canisters could be dangerous, very dangerous.  I'm talking about permanent injury, loss of eyesight, disfigurement, and even death.

You will note that I am not a lawyer.  I don't work for any company that could get sued here.  I'm not some ninny in an office who doesn't give a dang about whether you live or die in the back country so long as his company can't be sued.  I am just a fellow lover of the wilderness.  Any warning I give you is realistic and sober.  My warnings are not overblown silliness as are so many of today's legal warnings.  I'm giving it to you straight.  If you ignore me, you're a dumb ass, and I have little sympathy for you.  Don't come crying to me if you didn't heed my warnings.

In my original post on refilling gas canisters, I listed a series of precautions.  Read my original post on refilling gas canisters if you are thinking about refilling canisters of your own.  Please do your homework before you try something like this.  If you do try this, there's a certain danger to it, no matter what.  You're working with highly flammable, explosive gasses.  You've been warned.

Transfer from Like to Like
Not all canisters are created equal.  Some are stronger than others.  When you take canister gas from one canister and transfer it into another, you want to make sure that the receiving canister can handle the resultant pressure.  The ideal way to do this is to "stay within the brand." By "within the brand," I mean transferring Jetboil to Jetboil, Primus to Primus, etc.  If you transfer gas from a larger canister to a smaller canister of the same brand, you already know that the smaller canister can handle the pressure from that blend of gas.  Note:  Some companies, Primus in particular, have different blends:  Summer blend, winter blend, etc.  For companies with different blends, use a donor canister of the same blend as the receiving canister originally held.

If you can't find a donor canister of the same brand as your receiving canister, you can check on the company's website what blend (percentages of propane, isobutane, and n-butane) the canisters held to insure compatibility, but it's best to stay within the brand if you can.  Note that some companies do not publish their blend's percentages and that percentages can change over time.

Basically though, if you transfer from like to like, you minimize the risk that the receiving canister can't handle the pressure.

The Procedure
Custom filling/refilling is actually fairly simple.  I'll list the instructions below.

Before you start, weigh the empty canister.  The weight of the canister + the amount of gas the canister originally contained is the maximum safe total weight of the canister.  For example, if your receiving canister weighs 116 g when empty and originally held 220 g of fuel, then your maximum safe weight is 336 g (116 + 220 = 336).  The amount of fuel your empty canister originally held should be printed on the label of the canister.  If you can't read the label, get a different canister.  Only use canisters in good condition when refilling.
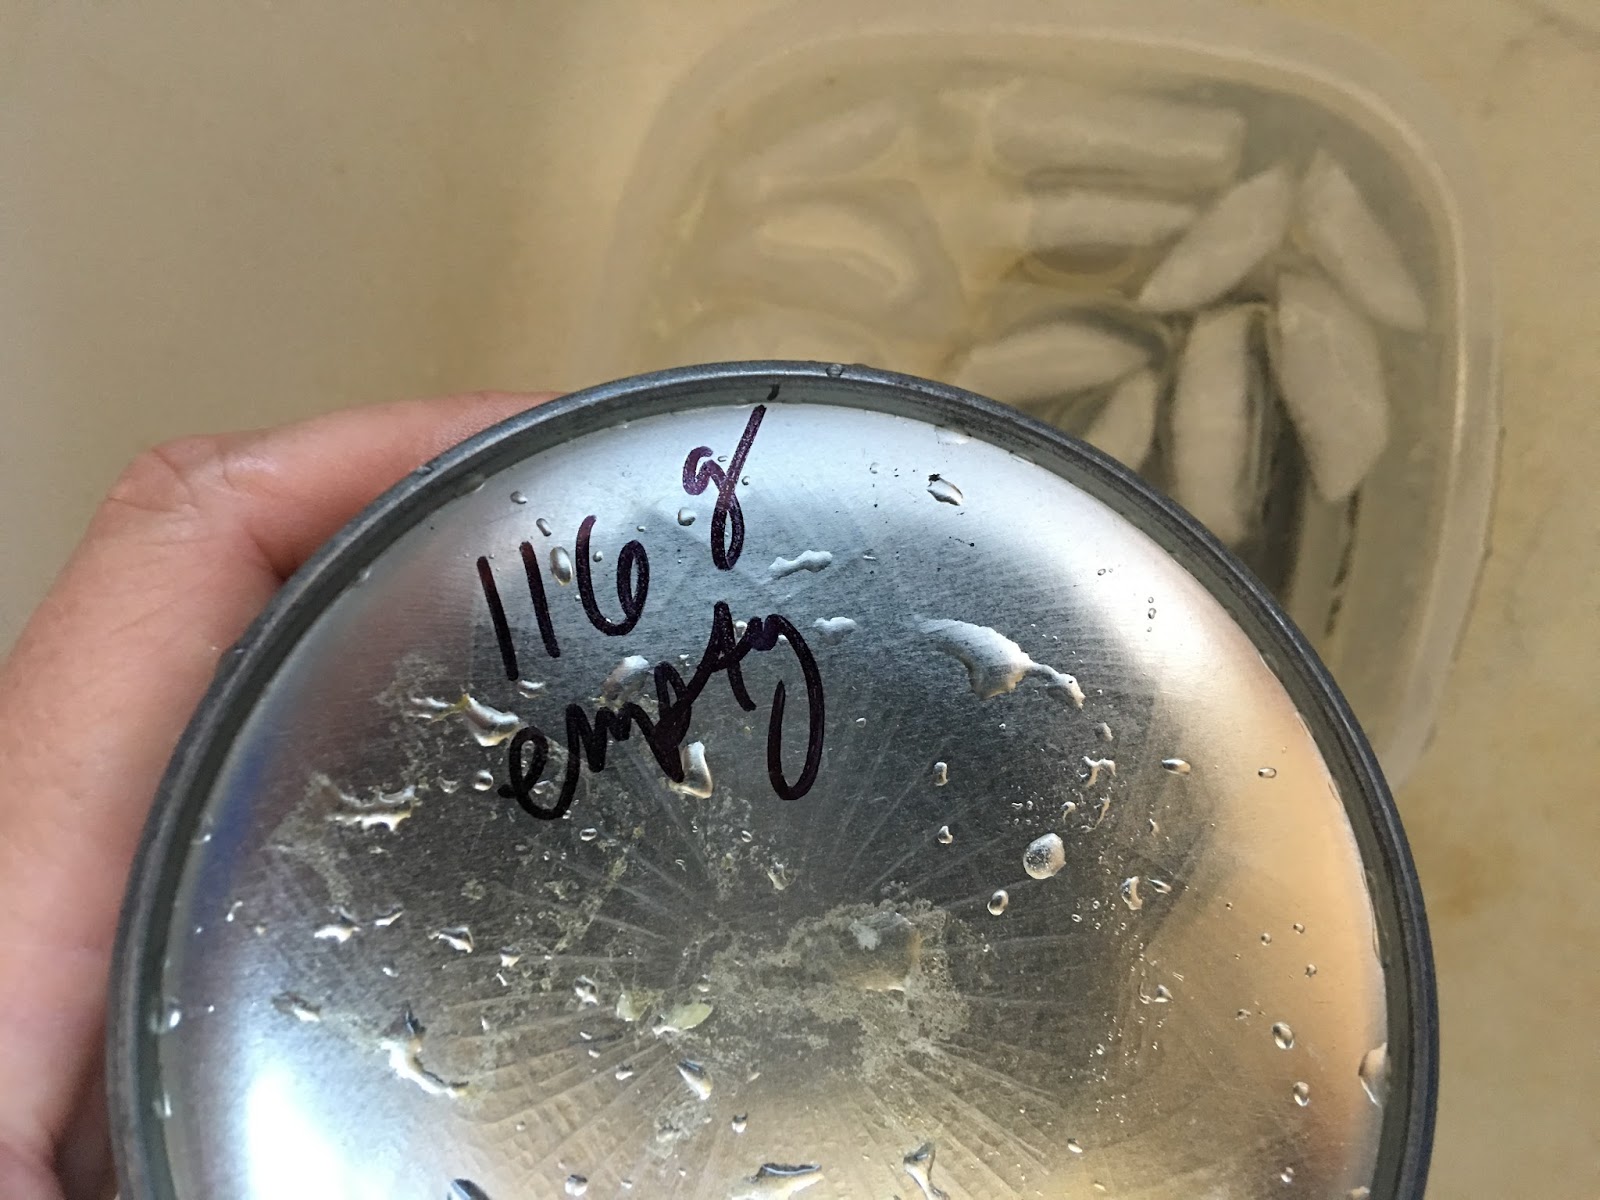
My receiving canister weighs 116 g when empty.
Once you've calculated your maximum safe total weight, do the following:
1.  Place the donor canister into a pan or pot of warm water.  I said warm water, not hot water.  Do not immerse a canister into hot water.  Hot water could cause the internal pressure of the canister to exceed the rating of the canister which could cause the canister to burst.  Do not put the canister in the pan while the pan is on a stove.  What if you left the stove on for a minute and got distracted?  Take the pot off the stove, and then put the canister into the warm (not hot!) water.
2.  Prepare an ice bath in a container that can hold the recipient canister and some water with ice.  You don't want the level of the water to exceed the height of the canister.  Keep the connector and Lindal valve area of the canister dry.
3.  Close the valve on the G-Works Gas Saver adapter.
4.  Screw on the empty receiving canister to the Gas Saver.
5. Take the donor canister out of the warm water, dry it off, and screw the donor on to the other connector on the Gas Saver.
6.  Place the receiving canister into the ice bath taking care to keep water out of the connector and Lindal valve area.
A G-Works Gas Saver properly hooked up with two canisters.
The donor canister is on top.  The receiving canister is on the bottom, in the ice bath.
Take care to keep water out of the connector and Lindal valve area of the receiving canister.
7.  Open the valve on the Gas Saver.

When you open the valve on the Gas Saver, you should hear gas flowing from the full donor canister into the empty receiving canister.

8.  After you've let it run for a minute or so, close the valve, take the receiving canister off the G-Works adapter, and weigh the receiving canister.  While you're weighing the receiving canister, put the donor canister back into the pan of warm (not hot!) water.  Repeat steps 6, 7, and 8 until the receiving canister is full.  Do not exceed the maximum safe fill weight of the canister.
Success!  My canister which weighed only 116 g when empty is now clearly full of gas,
BUT my maximum safe fill weight is 336 g.  I need to vent or burn off 10 g.
If you've over filled the canister, vent the canister outdoors away from any heat sources or open flame using the G-Works Gas Saver with one end attached to the over full canister and the other end not attached to anything.  When there is no canister attached to the other end, opening the valve on the Gas Saver vents the excess gas into the atmosphere.  Alternatively, you can just attach a stove to the over filled canister and burn off the fuel.

That's really all there is to it.  With the above described techniques and the G-Works Gas Saver, you can refill or custom fill smaller, lighter, more convenient canisters using larger, cheaper (per gram) canisters.

Versions
There are actually several versions of this adapter, all from Peakway.
1)  The old version of the basic adapter – 28 g (1.0 oz)
2)  The new version of the basic adapter – 36 g (1.3 oz)
3)  The "fancy" version with what appears to be a pressure relief valve.  I don't have this version and can't really comment on it.

I'm not sure why they switched from the old version of the basic adapter to the new version.  I can see what has changed, but I don't know the thinking behind the changes.  Perhaps it was just to reduce production costs; I don't know.

Concluding Remarks
Be safe and read all the cautions, please.  This is good stuff, but you do need to be careful.

Take care and happy stoving,

HJ

Appendix I – Custom Fuel Blends – DANGER
Danger.  We now depart from anything that might be considered remotely safe.  You're completely on your own here if you do this.  I'm not recommending this to you; I'm just saying it's physically possible.  Just because you can do something doesn't mean that you should.  I have not done this.  It's just too danged dangerous.  Try it at your own risk. And make sure your Life Insurance is all paid up, if you get my drift.  See photos of canister explosions, below.


What am I talking about?  Well, remember my recent post on the other G-Works adapter, the G-Works Propane adapter?  With that propane adapter and the G-Works gas saver adapter combined, you could add propane to a backpacking canister.
Never fill a backpacking gas canister with 100% propane.  

WARNINGS UPDATE, 8 April 2017: David, a chemical engineer, has left a series of remarks down in the comments section, below.  I suggest that you read them in detail if you're thinking of adding extra propane to a backpacking type canister.  Personally, I don't think you should try to add propane, but if you're going to try it, make sure you read, line by line, David's comments, below.

Why would you add propane to a backpacking canister?  Well, for cold weather.  Recall that propane is your best fuel for cold weather. In the US, the most propane content you can get in a backpacking canister is about 25% or 30% depending on whether it's mixed with isobutane or n-butane.  You could boost that percentage to 35% or 40% if you combine the G-Works propane adapter with the Gas Saver adapter.  No, I don't have any photos of this combination.  This is very dangerous and I have not tried it.

If you do add additional propane to your backpacking canisters, add the propane last.  Why?  Well, if you add propane to an empty canister, then, at least for a while, you've got 100% propane in there.  That could be bad, very bad.  Those little lightweight (comparatively) backpacking canisters cannot handle the high pressure of 100% propane.  DON'T DO IT.  I'm not sure you should add propane to a backpacking canister at all, but if you do, add the propane last, after the canister has a factory blended fuel mix in it.
Never fill a backpacking gas canister with 100% propane.  
A stove and pot destroyed by a canister filled with 100% propane.
Note how the canister has burst.
NEVER fill a backpacking type canister with 100% propane.
Backpacking canisters are only strong enough for partial propane mixes, typically 80/20 isobutane/propane or 70/30 n-butane/propane.  Filling a backpacking canister with 100% propane risks an explosion.  Backpacking canisters just aren't strong enough to handle the very high pressures involved with 100% propane.
Never fill a backpacking gas canister with 100% propane.

A stove and pot destroyed by a canister explosion.
NEVER fill a backpacking type canister with 100% propane.

Coleman Gas Canisters – Emergency Work-Around

Recently, I issued a Caution on Coleman Canisters.  The latest Coleman canisters, those with an orange label on top of the canister can have trouble with other brands of stoves.  Jetboil and Primus stoves generally work with the orange label Coleman canisters, but the results are mixed with other brands.  For example, I tested an MSR Pocket Rocket, and it didn't work for me, but someone else tested the same stove and it worked fine for them.

So, what happens if you have a non-Coleman stove, need a canister, and the only brand available in a given area is Coleman?  There is an emergency work around.  Note the use of the word "emergency."  This is for when you're in a real jam and the lack of a stove may get you seriously injured or killed.  This is not for convenience or when you are merely hungry.  This could be dangerous.  Use in times of desperation only.  You can stick a very small pebble in the valve opening, hopefully a really smooth one that won't jam open the Lindal valve in the neck of the canister.  Better still is some small ball bearing or the like which is less likely to jam open the valve than a pebble.  This is to be used only if you just have no other options, and even then I recommend against it unless you're going to get frostbite or hypothermia or something.  This is not something to be taken lightly.  Gas is highly flammable and explosive.  You're totally on your own if you do this.  Your warranty is void.   You can't sue the stove manufacturer.  You can't sue the canister manufacturer.  You can't sue me; I've already told you this is dangerous.


WARNING
Read every word in detail of this post or don't read any of it.  This describes a last resort, a potentially very dangerous last resort.  Don't do this if you're not good mechanically, if you're not meticulous, or if you're not familiar with working with canister gas stoves.  This is to be used only if you just have no other options, and even then I recommend against it unless you're going to get frostbite or hypothermia or something.

Example
Here's an example:  I couldn't get my nice, shiny, new MSR Pocket Rocket 2 to work with a Coleman orange label canister.  No way was I going to crank down hard on the stove; that's a good way to ruin the threads on your stove.  A friend sent me a small baggie of #7 shot.  I put a piece of the shot into the opening of the Lindal valve.
Placing a piece of #7 shot into the Lindal valve's opening
I then pushed the shot down into the valve with an eyeglasses screw driver.  A paper clip would probably also work.
Pushing the shot down into the valve opening with an eyeglasses screw driver.
I then screwed on the stove, and... Success!!
Success!  A stove that heretofore would not work on a Coleman canister now works just fine.
The shot acts as an extender on the pin of the stove.  Whereas before the pin was too short, now, with the extension provided by the shot, the stove works fine.

Caution!
Now that the pin is longer, the pin engages sooner.  You will get more gas escaping when you screw on the stove than normal.  I do NOT recommend this procedure, but, if you're stuck, you could try it as a last resort.  Be aware that if you do this with a small pebble, the pebble could wedge into the valve.  If the pebble wedges into the valve, when you screw the stove off, the gas will continue to flow!  A bit scary, but no worries, just screw the stove back on.  You'll have to hold the gas back with the valve of the stove, which is a royal pain in the neck, but what else are you going to do?  Again, this is only something you should do as a last resortand even then I recommend against it unless you're going to get frostbite or hypothermia or something.  In general:  Do not buy Coleman canisters unless you're sure they'll work with your stove.

Oh, and of course NEVER change a gas canister near a heat source or open flame.  That could be, um, bad.  Flames, burning, death, you know, bad.  You don't want that; trust me.


Danger!
DO NOT light your stove if you hear gas hissing.  When you screw on your stove, make sure you get a good seal.  If you hear gas hissing, even the slightest amount, do not use that canister.


So, there you have it, an emergency (only!) fix.  This is to be used only if you just have no other optionsand even then I recommend against it unless you're going to get frostbite or hypothermia or something.

Stay safe out there,

HJ

Sunday, March 19, 2017

Coleman Canister Gas – Caution

Coleman brand gas canisters now only normally work with Coleman brand stoves.  You might get lucky, but the current orange label Coleman brand gas canisters just plain don't work with a lot of brands of canister stoves.
UPDATE 25 March 2017:  See caveats to the above in the "Stoves Tested" section.
UPDATE 27 March 2017:  There is an emergency work-around:  Coleman Canister Gas – Emergency Work-Around
UPDATE 28 March 2018:  Since the Coleman canisters don't work reliably with the majority of my stoves, I'm now using them as "donor" canisters when I refill my canisters that do work.  See:  Refilling Backpacking Canisters II

What has changed?
I've never had this problem before with the older green label Coleman canisters.   Recently, it seems there's been a change.  The new ones have an orange label (see photo, below), but the changes appear to go beyond color.  They just don't work with other brands of gas stoves.  I'm speaking here about backpacking type canisters only.  I am NOT referring to the big 100% propane green canisters.
Front row:  The older "green" Coleman canisters.
Rear:  The newer "orange" Coleman canister.
Here's how I happened on this:
I test stoves.  A lot of stoves.  I burn gas.  A lot of gas.
Simul-testing multiple stoves.  I burn a lot of gas.
So, I bought some of the big 450 gram Coleman canisters recently at Walmart.  They're the cheapest brand (at least when bought at Walmart).

When I got them home, they simply didn't work.  On any stove tried (see list, below).  And I've got a lot of stoves.  None of them worked – until I tried a Coleman brand stove.

Here's a quick video:

And I am not alone.  Others are reporting similar experiences.

NOTE:  I am not accusing Coleman of doing this deliberately.  Why would they do that?  They want to sell as many canisters as possible.  If they make it so their canisters cannot be used with other brands, their sales will go down. I think this is a goof, not a deliberate business decision.

Stoves Tested

These stoves did not work when tested with orange label Coleman gas canisters:
  • MSR Pocket Rocket
  • MSR Pocket Rocket 2
  • BRS-3000T
  • Markill Hot Rod
  • Soto WindMaster
  • Kovea Supalite
  • Monatauk Gnat/FMS-116T/Olicamp Kinetic Ultra
  • Snow Peak GeoShield
These stoves kind of worked with orange label Coleman gas canisters cranked down hard (NOT recommended):

  • Kovea Titanium/Markill Hotrod
  • Soto MicroRegulator
  • Optimus Crux

These stoves did work with orange label Coleman gas canisters:
  • Jetboil PCS (personal experience)
  • Jetboil MiniMo (reported)
  • Primus Eta Express
  • MSR Micro Rocket
  • Soto Amicus
  • Snow Peak GigaPower
  • eTekCity (multiple reports)
It looks like Jetboil and Primus brand stoves in general do work with Coleman brand orange label gas canisters, but obviously I haven't tested each and every model of Jetboil or Primus stoves.  You'll probably be fine, but you should test your Jetboil or Primus stove with Coleman canisters before you head out on the trail.  However, I have now one report of a Jetboil not working with an orange label Coleman canister.

Other brands are all over the map.  Some models work; others do not.  I've had reports of a Pocket Rocket working, but my Pocket Rocket did not.  This tells me that the Coleman canisters are very close, only off by maybe half a millimeter or something like that.  Their Lindal valve is recessed just a bit farther down in the threaded connector than other brands.  It doesn't take much.  Notice the middle category, above:  Stoves that kind of worked.  It's that close.  Your "mileage" not only may but will vary.

Recommended:  Test your stove with Coleman orange label canisters if you plan to use them.
Not recommended:  Cranking your stove down hard to get a Coleman canister to work.  Stove threads are typically aluminum or brass which is softer than the steel of the canisters.  Don't ruin a good stove over a $5 to $10 canister.  Just buy a more reliable brand.  I have had no problems with the following canister brands:

  • MSR
  • Snow Peak
  • Optimus
  • Primus
  • Brunton
  • Jetboil
  • Gas One
  • Glow Master
I haven't tried Olicamp canisters; I haven't seen them for sale locally.

Conclusion
So, be careful.  That Coleman canister may be cheap (when purchased at Walmart), but it may not work with your stove – unless your stove happens to be a Coleman stove (or probably Jetboil and Primus, perhaps others).  Perhaps I'm belaboring the obvious, but always test your stove with the canister you intend to use before you hit the trail.  This is probably a good idea with all brands but particularly with Coleman brand orange label gas canisters.

Happy stoving,

HJ

Saturday, March 18, 2017

Upright (Top Mounted) Canister Stoves – the State of the Art


What are the best upright (top mounted) canister gas stoves of today?  What are our options?  What's the best technology?
The latest from MSR:  The new Pocket Rocket 2
I've got a friend who works over at Massdrop*.  He's been bugging me to do a stove article, a sort of taking stock of the current state of canister stoves.  Kind of a fun project, so what the heck, I wrote a little something up:  Upright Canister Stoves – the State of the Art.

This post here on my blog has something that I couldn't include in the article, a dynamic HTML version of the chart in the article; see below.  NOTE:  The version of the chart on Massdrop is downloadable.
A classic old Hank Roberts stove.
I created a table of upright canister stoves available in the US today.  I've got pretty much all the major brands and even some that are less well known.  I didn't get everything, but it's a pretty representative compendium.

I didn't have a way to create a dynamic HTML table over on Massdrop, so I thought I'd create one here.  It may be easier to read this dynamic HTML table, depending on what type of device you're viewing things on.  Neither method of presentation is perfect, but hopefully one or the other gets the job done for you.  To see this as a jpg image, refer to my full article:  Upright Canister Stoves – the State of the Art.  Generally, mobile devices do better with a jpg image.
Adventures In Stoving -- https://AdventuresInStoving.blogspot.com
Brand Stove BTU Grams Oz's Class $$'sPros Cons Comments
BRS BRS-3000T 9,200 25 0.9 SUL $20 Super Ultralight, compact, inexpensive Terrible in wind, pot supports can deform if overheated (inconsistent quality control), poor pot stability, short valve handle Poor pot stability, but dang is it light, compact, and cheap.  The only Super Ultra Light canister stove on the market.
Fire Maple FMS-300T (Olicamp Ion Micro) 8,900 45 1.6 UL $50 Ultralight, compact Open burner, poor pot stability, short valve handle, loud Limited pot stability, a bit loud.  Sold under Olicamp brand in US.  Cheaper on Amazon or eBay.
Fire Maple FMS-116T (Olicamp Kinetic Ultra) 9,600 48 1.7 UL $50 Ultralight.  Good pot stability.  Well distributed flame avoids hot spots Open burner, not particularly compact A little more distributed flame than some UL stoves.  Sold under Olicamp brand in US.  Cheaper on Amazon or eBay.
Snow Peak Lite Max 11,200 54 1.9 UL $60 Ultralight, compact, low carbon monoxide Open burner Surprisingly compact.  Good pot stability.  At 11,000 BTU/hr it can really eat fuel if you let it.  Turn it down. Made by Kovea.
Kovea Supalite 6,575 56 2.0 Light $50 Light, very compact, low carbon monoxide Open burner Surprisingly compact.  Good pot stability.  Some variants are 56 g; others are 60 g.  Made by Kovea.
Soto WindMaster 11,000 67 2.4 Light $75 Wind resistant, excellent build quality, sophisticated ignition, regulated burner, good to excellent pot stability.   Detachable pot support can be lost, tall (not compact), pricey, but there are deals out there. Great stove.  Best upright canister stove on the market today -- if you can live with the detachable pot support.  
GSI Pinnacle 8,750 68 2.4 Light $50 Seems reasonably well made. A little over priced for its class.  Open burner. I haven't really seen this one in person, but I've seen some talk on the net; I therefore include it for completeness.
Optimus Crux Lite 10,200 72 2.5 Light $40 Lighter than the regular Crux Bulky, open burner Doesn't pack well because burner doesn't fold.
MSR Pocket Rocket 2 8,200 73 2.6 Light $45 Simple, solid, improved pot stability Open burner I really like it's simplicity and how solid it is. Made by Kovea.
Soto MicroRegulator 11,000 73 2.6 Light $70 Excellent build quality, sophisticated ignition, regulated burner. Somewhat floppy pot supports; open burner. Nice stove, but I would go with the WindMaster if you're looking at this type of stove.
Soto Amicus (manual, piezoelectric).  Add $5 for piezo 10,200 75 2.6 Light $40 Wind resistant, excellent build quality, sophisticated ignition, excellent pot stability. Slightly bulky when compared to the most compact. A really fabulous new entry from Soto at a nice price point.  The wind resistance is real.  Definitely worth a look.
Primus Express (manual, piezoelectric).  Add $10 for piezo. 8,900 82 2.9 Light $45 Good build quality. Excellent pot stability. Open burner.  Pot supports do not fold out of the way and take up a lot of room.  Not the best piezo. Primus makes good stuff, but I think their Express stove is a little heavy for what it is.
Snow Peak Gigapower (manual, piezoelectric).  Add $10 for piezo. 10,000 85 3.0 Mid $40 Good pot stability, compact, strong, low carbon monoxide Heavier, open burner.  Poor ignition. A classic, fantastic stove albeit a bit heavy by today's standards.  The ignition sucks; get the version without.  Made by Kovea.
Olicamp Vector 10,200 85 3.0 Mid $30 Reasonalby priced Open burner Included as a low cost option.
Kovea Titanium 7,600 88 3.1 Mid $60 Reasonably compact Poor quality ignition, open burner. Ignition isn't particularly reliable.
Optimus Crux 10,200 93 3.3 Mid $50 Fairly compact Heavier, wobbles at joint, open burner, open burner Nice stove, but it would be great if it didn't wiggle at the joint.
Jetboil Mighty Mo 10,000 95 3.4 Mid $50 Regulated burner Poor quality ignition, only fair pot stability, open burner Lowest cost regulated burner, but the ignition is crappy.  Soto's stoves in this class are better but more expensive.
Kovea Power Nano 7,300 95 3.4 Mid $35 Inexpensive Heavy for its class.  Open burner
Kovea Eagle 6,000 128 4.5 Heavy $30 Inexpensive Heavy for its class.  Open burner
MSR Super Fly (manual, piezo).  Add $10 for piezo. 10,000 177 6.2 Heavy $65 Distributed flame, threaded and non-threaded canisters Heavy, bulky, sharp, pointy pot supports, open burner Dislike.  Too big, too bulky, too heavy, and the pointy pot supports poke holes in your pack.
Primus Classic Trail (Yellowstone) 10,000 227 8.0 Heavy $20 Inexpensive Heavy, bulky, open burner Cheap, good pot stability, can handle larger pots, but I'm not a fan of this heavy beast.
Adventures In Stoving -- https://AdventuresInStoving.blogspot.com

I hope you find the information useful.

HJ

*Massdrop, if you haven't heard of it, is sort of a "group buy" site.  They contact companies and basically say "hey, if we could get X number of sales, would you give us a price break?"  If a company agrees, Massdrop then posts a "Drop" on their site.  Members of the public can then join the Drop and get a group discount.  Here's a link:  https://www.massdrop.com/r/ETFBT7. I think I get a free T shirt or something if enough people click on that link and then later buy something, but whatever.  I hope you find a couple of good deals.
An old Camping Gaz S-206 "Bleuet" stove.
The canister had to be physically punctured and could not be safely removed until empty.

Sunday, March 5, 2017

BRS-3000T – Failure #3

Since the pot supports failed on my BRS-3000T, a number of people have come forward saying that they have experienced the same thing.  I thought I'd post a couple more photos, below; the photos are from John H.  John reports that he had good results with the stove at first but that over time the pot supports deformed.

Links:
Note how the pot supports have twisted out and away from the stove.
Notice that these photos are pretty much the same as the first set and also the second set.  In other words, the same thing appears to be happening repeatedly.
It's not a gross failure, but the pot clearly cants off to one side.
BUT there are plenty of people who are experiencing no problems at all.  Matt S. recently ran a 15 minute test on his (after seeing my post).  No problems.  Gary D. reports doing up to 20 minute runs while melting snow.  That's a long run. No problems.

Some people have a failure with only one cup of water on; others melt snow for 20 minutes and have no failure.  It’s a hit or miss stove.  You might get lucky and get one that’s fine.  You might not.

I’m going to revise my original post to recommend a test run.  Run the stove  for 15 minutes on high with 2 cups of water on before taking it out on the trail for the first time.  If your stove can handle a 15 minute run on high at home, then it's probably going to be OK out on the trail.  If it fails at home, just buy another one.  They're cheap enough.  Eventually you should be able to get a good one.  Of course you could just get a quality stove in the first place and be done with it, but each to his or her own.

Some people have advocated carrying more than one BRS-3000T at a time.  They're so light and so cheap, why not?  If one stove fails, just swap it out for the one in your pack.  If you decide to go the multiple stove route, maybe you should space out the purchases so that you get a stoves from different manufacturing lots.  Hopefully the chances of getting two duds is minimized.

HJ

Another failure, this one reported by Terry S. who reports that the metal had become so soft with use that he could no longer depend on the stove.
A stress fracture has developed on the pot support arm of this BRS-3000T


Thursday, March 2, 2017

BRS-3000T – Failure #2

I recently completed a review of the BRS-3000T.  In that review, I mentioned that one of my pot supports deformed after 10 or so minutes of using the stove.

Links:
My pot, listing to the left, after one of my pot supports deformed.
Since posting that review, a couple of other people have come forward and mentioned that they've had similar experiences, including Miguel C. who kindly sent me the below photographs.
A BRS-3000T with deformed pot supports.
Photo courtesy of Miguel C.
Miguel reports the following:
Not sure how it happened.  I was just cooking rice and a cup of water.  I was using the msr [Titan] kettle and two of the stands bent a lil.   
The stove was on medium low cooked for like 15 [minutes].  It got super red.  There was no winds but it was cold.  It happened at night.

Another view of a BRS-3000T with deformed pot supports.
Photo courtesy of Miguel C.
You will note in the above photo that the pot stands are even more deformed than mine were.

Some people have criticized my use of a 1300 ml pot and 3 cups of water as "heavy."  While maybe someone could misconstrue 3 cups of water as "heavy," an MSR Titan Kettle with just one cup of water cannot.
Miguel's MSR Titan Kettle which contained only 1 cup of water and some rice.
This is not a weight issue.  This is a design and materials issue.

So, What the Heck is Happening?

Well, for one, the titanium here is not melting.  Titanium melts at about 3000 Fahrenheit (about 1700 Celsius).  The flame temperature in air of a butane-propane mix (i.e. canister gas) is about 3500 Fahrenheit/1970 Celsius, but you'd have to really focus the flame, as in a blow torch or similar, in order to get the metal that hot, and air would tend to conduct away the heat.

OK, so it's not melting.  So what is happening?  Well, metals get soft long before they melt.  Think of a blacksmith shoeing a horse.  He doesn't melt steel, pour it into a mold, and make a custom shoe.  No, he typically already has the shoe made.  He just heats it and then pounds on it until it's the right shape.  He heats it because the metal gets softer, and then it's easier to work with the metal.

The same thing is true with titanium.  Long before it melts, Titanium will become more malleable. Metals are assigned a rating called a "service" rating.  This a temperature above which the metal becomes unreliable.  The maximum service rating for titanium is 1100 Fahrenheit/600 Celsius, and that's for a really high grade alloy. The alloy used in a backpacking stove has a rating more likely around 750 Fahrenheit/400 Celsius.  Our flame temperature is 3500 Fahrenheit/1700 Celsius, more than four times the service rating of the metal of our stove.

Titanium is a poor conductor of heat.  If the heat can't be conducted away, and the small, thin pot supports of the BRS-3000T aren't going to conduct a lot of heat, the temperature can climb above the maximum service rating, and "creep deformation" can occur.  Creep deformation isn't a sudden snap or anything like that.  It's a gradual softening of the metal.   The metal slowly droops.

In the case of Miguel's stove, he had it on for a fairly long time (15 minutes) and it was a still night.  With no air currents to whisk away the heat, the temperature of the metal climbed above the maximum service rating, and... well, you can just look at the photos, above.


The Good News
Miguel reports that he just bent the pot supports back after the stove cooled and went on his way.  He continues to use the stove.  Now, how many times can you do this before the supports break?  I don't know, but I wouldn't push it.  You want to avoid getting the supports too hot.

I too just took my fingers and bent it back.  The BRS-3000T isn't exactly a beefy stove.  It's pretty easy to bend the thin little pot supports.


The Bad News
The bad news here is that Miguel's failure happened in still air (or a breeze so light as to be undetectable).  My failure occurred when the wind focused the flame on my pot support.  I was thinking that all one had to do was protect the stove from wind.  I still think it is important, vital actually, to protect the stove from wind, but one also has to worry about excessive heat build up in the right conditions.  It's a bit of a wild card here, but in general shorter burn times should be OK.

Interesting stuff.  More will be revealed.

HJ