QuietStove.com

Saturday, February 19, 2011

Stove of the Week: MSR Reactor

Sometimes, technology can be brought to bear in ways that change the very game.  So it is with the technology of the MSR Reactor.
Hail the inferno; this is the hottest stove out there.  It boils water faster than anything else I've ever seen.  It's not light, it's not cheap, but dang is it effective.

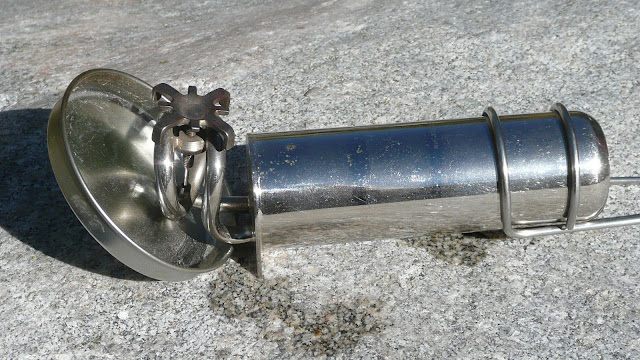
Let's take a look.  Here's a Reactor all packed for travel. The handle locks across the clear lid holding everything securely.
Inside you can fit an 8oz/230g canister of gas, the burner, and a little bit more.  I've got it wrapped here in a wash cloth just to prevent rattling.  It could easily accommodate a spoon and a lighter.  One pushes the "ball" on the left side of the handle.  The handle springs up.  One then unfolds the handle, like so:
I like the fact that the handle locks down, holding everything in place, but herein lies a vulnerability.  The small piece of metal shown below is all that holds that handle in place.

Every time that handle is folded or unfolded, that small piece of metal has to bend.  Repetitive bending of a metal = metal fatigue = failure.  I've not heard of failures of this point, but they inevitably will come.  How soon?  I can't say, but I think this is a weakness in the design.  Note:  I don't mean to sound alarmist here.  I don't think the handle will fail immediately. I think we're talking about years here not days or months. 

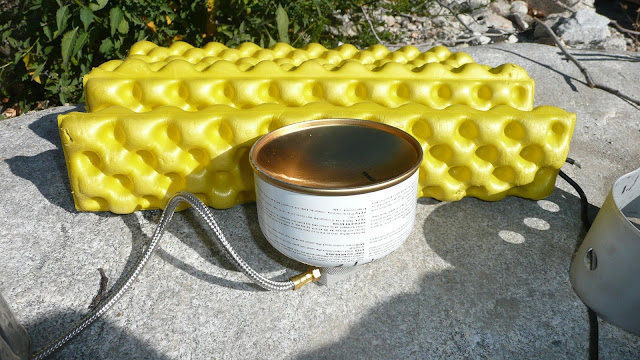
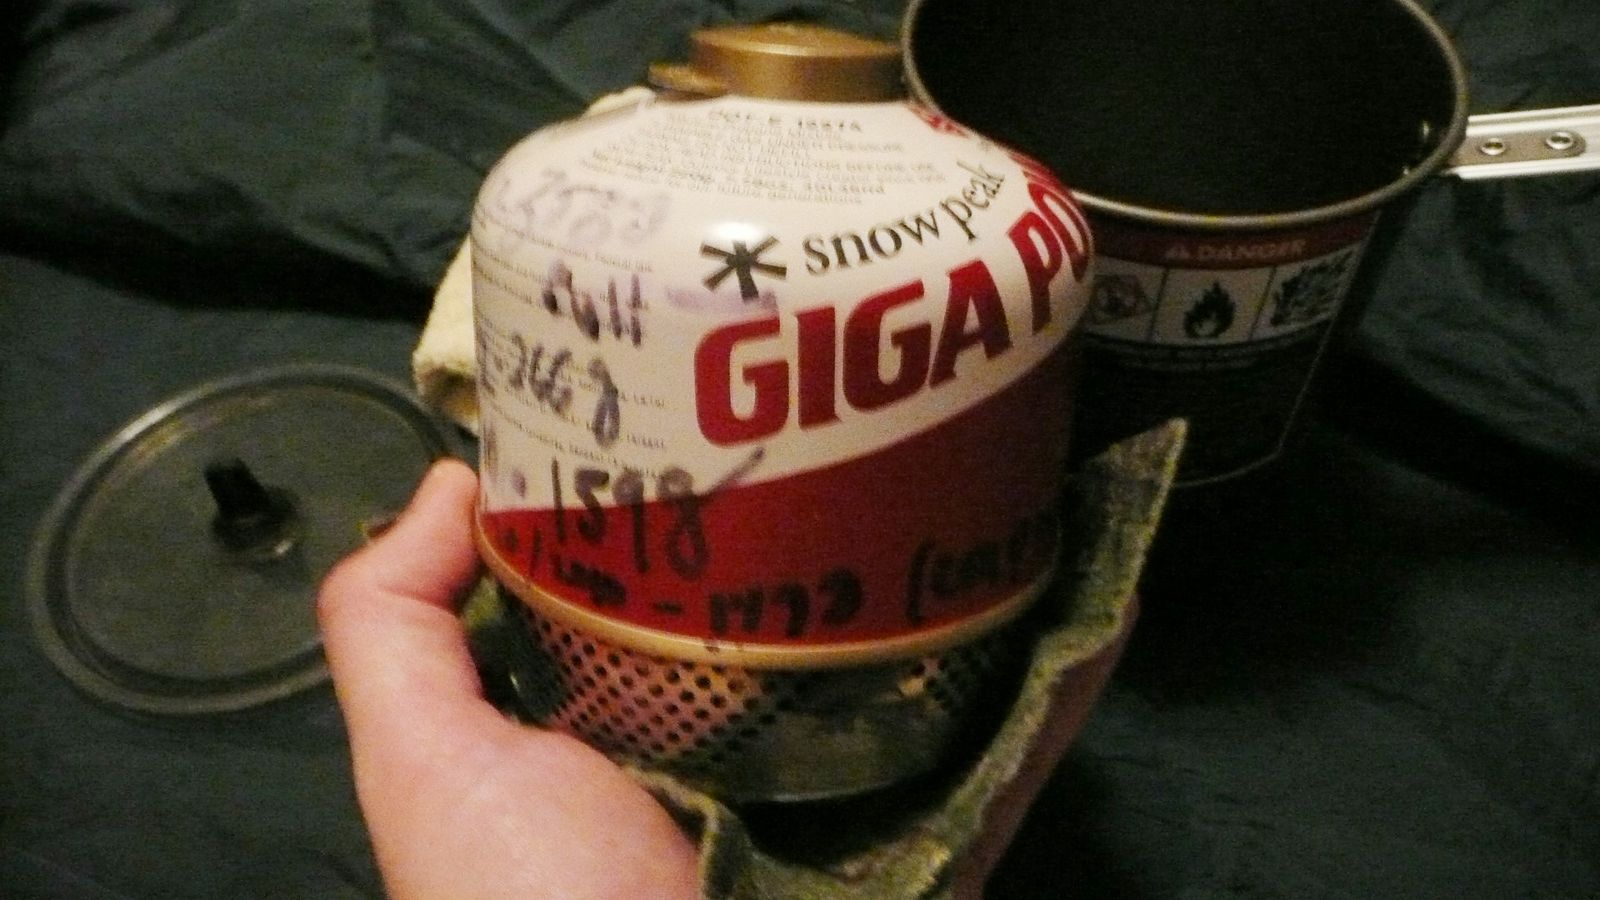
Another nice feature, the burner nestles up inside a 8oz/230g sized gas canister.

OK, so it packs up nicely.  Fine.  But what the Dickens is all the buzz about?  I'll tell you.  HEAT, baby, heat.
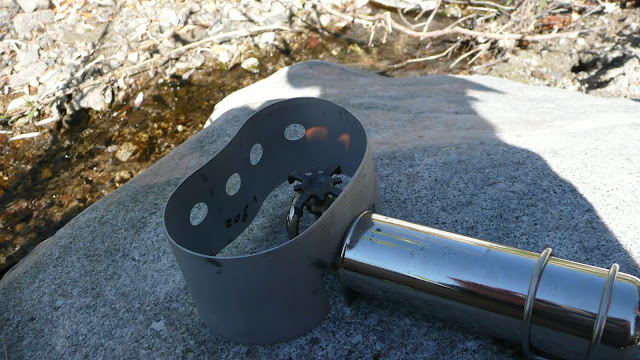
The MSR Reactor is all about putting heat into whatever is in your pot.  How does it do it?  First, with a radiant heat burner.  It burns fuel, but not in an open flame like a normal burner.  Instead, the burner head is heated by the burning of gas and then heat is radiated into the pot.  The radiant heat burner:
Heat is transferred first by a fairly tight nesting of the burner underneath the pot.
And then by an integral heat exchanger

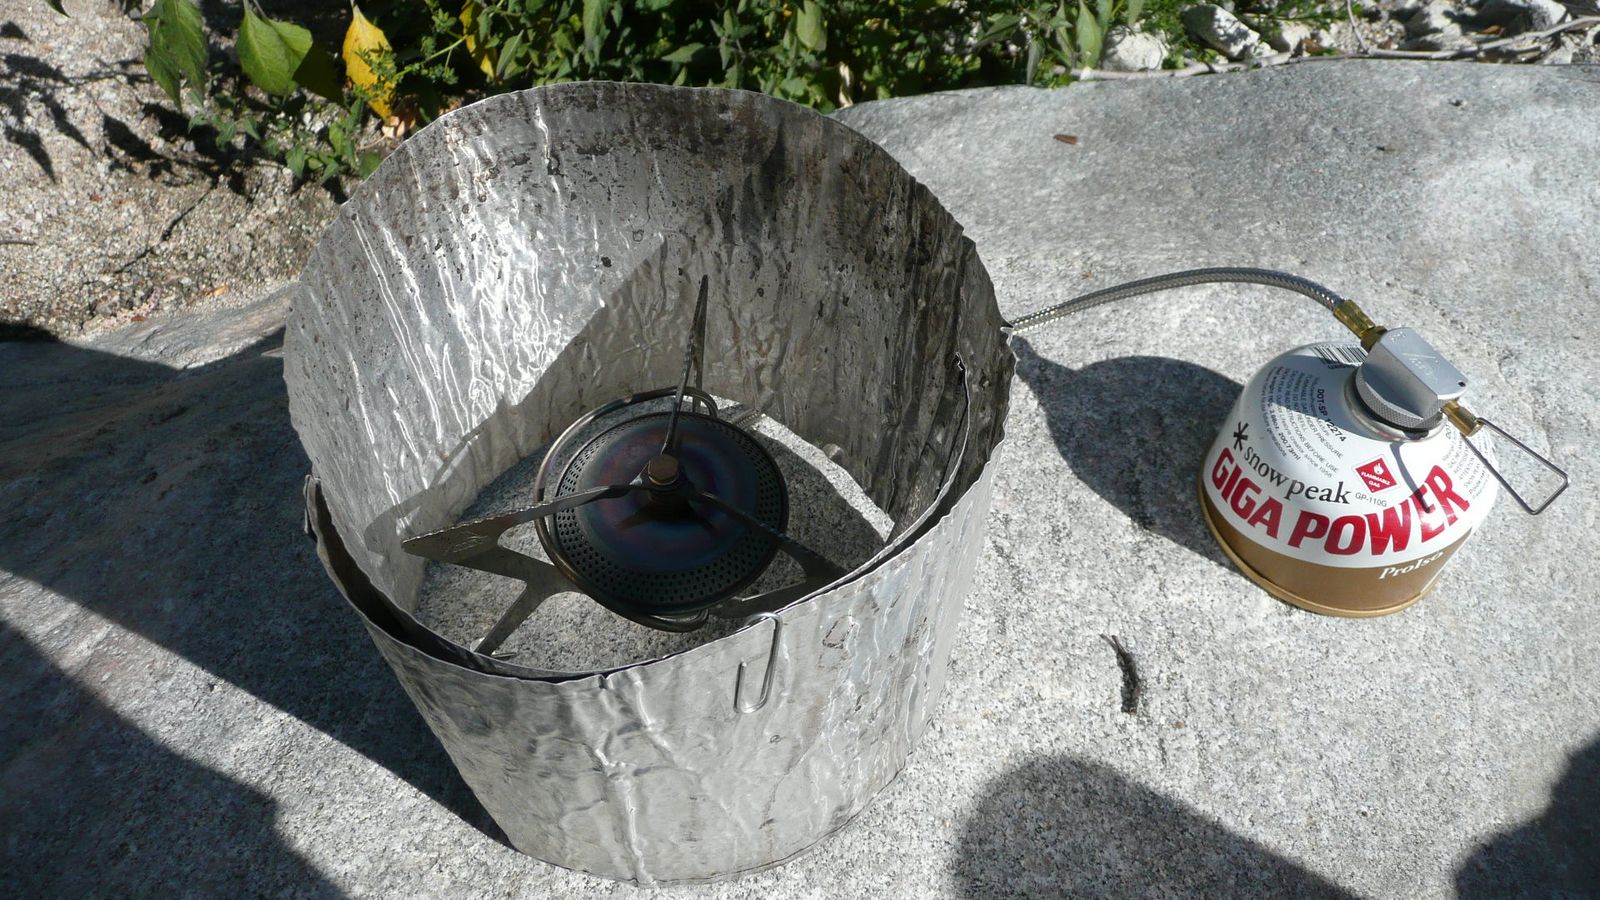
Wind?  Not a problem.  When the pot is mounted on the burner, you can't even see the burner.
Heat flows from the burner to the heat exchanger into the pot.  Any exhaust heat is forced up along the sides of the pot until it reaches the vents seen in the above photo, a process transferring yet even more heat to the contents of your pot while still being almost totally protected from the wind.  In a 100 mph gale on top of an exposed plateau at 15,000' (4500m), this is the stove to have.  Note also that I'm holding the burner at a steep angle.  The pot doesn't budge. If you jostle your pot in tight quarters, no problem.  Your pot -- and your supper -- are staying right where you put them.  No tippy, slidey action here.  Still, not a bad idea to put a set of "legs" under your canister if you've got 'em.  The Brunton CanStand, Primus Foot Rest, and JetBoil tripod stabilizer all should fit an 8oz/230g sized canister.  The JetBoil version is shown here.


Another nice feature?  How about liquid measurement lines on the inside of the pot?

And don't forget the little pack towel they give you.  I use it to protect the bottom of the burner -- and the bottom of the pot.

One caution:  This is a seriously hot stove.  A friend of mine walked away for a minute and got distracted.  When he got back, the pot had not only boiled dry, it had melted.  It's a dang good thing that his canister didn't overheat and explode.  As it was, he lost his pot.  He could have lost a whole lot more.  This is a stove that you want to keep an eye on.

Well how about at the other end of the temperature range?  What about simmering? Well, the Reactor quite frankly has a bad reputation in the simmering department.  But lack of simmering is not a given with the Reactor.  There are a lot of individual variations Reactor to Reactor, and some of them do simmer if you're patient and willing to fiddle with them.  Here's a Reactor on low flame.
For a bit more on how to simmer, I'll refer you to this YouTube video that I put together.

Now, the question that is probably on every serious mountaineer's mind is, "how is it at melting snow?"  It's great.  It's super hot; it's wind proof; what more could you want?

Ah, but high tech though it is, it is still constrained by the laws of physics and therein the problem lies.  This is an upright canister stove.  On an upright canister stove, vaporized gas is fed to the burner where it is combusted, producing heat. In cold weather, gas doesn't vaporize very well.  There are a lot of factors that control whether or not a given upright canister type stove will work well in cold weather (you can see some of my other blog posts for more about this) and a Reactor will do better than some, but high tech or no, there's a point at which your fuel simply will no longer vaporize.  There are tricks you can employ like sleeping with the canister at night or carrying the canister inside your jacket by day and then using the first gas in the warm canister to heat up some water which is then placed in a spare pan into which you place the canister, but tricks like that can only take you so far.  My working number is 20F/-7C.  Below that, you begin to push your luck with an upright canister stove.  For all its technology, the Reactor cannot escape the constraints of physics.  Is it a good snow melter?  Sure.  Down to about 20F, maybe even a little lower.  But somewhere around that temperature 20F, you run into a hard stop, a hard stop that the Reactor's technology simply cannot overcome.

Note:  if you're a serious mountaineer and you're ascending to very high altitudes, you can operate a Reactor at lower temperatures than 20F.  Gas will vaporize at a lower temperature at higher altitudes.  But you'd better do your homework and understand just what the Reactor's temperature limitations will be for the altitude you'll be at.  Guess wrong and you've got no stove.  No stove = no water = dehydration which can lead to hypothermia which can lead to death.

Bottom line?  This is a great stove, but in cold weather you'd better darn well know it's limitations.

Thanks for joining me on another adventure in stoving,

HJ

The MSR Reactor

What's good about it
Hot
Wind proof
Stable
Hot
Well thought out
Extremely functional
Hot
Packable
Reasonably Efficient (if you don't run it on high)
Hot
Can nest an 8oz/230g gas canister inside the pot.
Liquid measures delineated on inside of pot
Did I mention hot?

What's bad about it
Expensive 
Heavy 
Bulky
Can eat a lot of fuel if you run it on high
Limited by it's upright canister type to temperatures of about 20F.
Can be tough to simmer.

Sunday, February 13, 2011

Stove of the Week: The Borde Stove

Stove of the Week:  The Borde stove

I've been blogging about lightweight winter capable stoves for the last three weeks (the Coleman Xtreme, the MSR Simmerlite, and the MSR WindPro).  I'll conclude this series within a series on lightweight winter stoves with this week's post, but I'm going to continue to feature winter capable stoves for a few more weeks, but this is the last on lightweight ones. Next week will feature the MSR XGK II (pre shaker jet version).

So to conclude my mini-series on lightweight winter capable stoves, this week's stove is the Borde Stove, also called the Borde benzin brenner (Borde gasoline burner).  (ボルドーバーナー)  The Borde stove burns good and hot.  Note the color of the tips of the flame spreader in the below photo.  That stove is HOT!


The Borde stove is a diminutive cult classic with a very loyal following among mountaineers. It's compact and, at about 8.5 ounces (241g), relatively lightweight.


However, with respect to the stove's weight, two things should be noted:  1)  There is no integrated pot support and 2) the capacity of the fuel tank is perhaps only 250 ml -- if that.  As with most "white" gasoline type stoves, air space must be provided within the tank in order for the stove to work properly.


One should also note that there is no valve knob on this stove. How then is it controlled? The "star" burner itself is rotated with a control hook. Rotation to the left increases the flow of fuel, to the right decreases the flow. Unfortunately the original control hook for my stove has been lost somewhere along the way. Fortunately, it is relatively easy to make a new control hook from steel wire. Home made control hooks:


Rotating the "star" burner plate assembly with a control hook.


Here's a closer look at the "star" burner plate assembly. Note how the assembly is threaded and that the base of the assembly screws into a short tube directly attached to the coils. It is here, at the point where the assembly screws into the coils, that fuel is emitted.


OK, let's get started shall we? Now, since the Borde is a white gasoline type stove, we'll need to prime (pre-heat) the stove. The directions say that one should open the valve (by rotating the "star" burner plate assembly to the left), turn the stove upside down allowing a small amount of gasoline to come out, and ignite the gasoline while holding the stove in one's hands. Let's see, holding a lighted container of dripping gasoline in one's hands. Uh, is it just me or does this sound completely nuts? lol. There is a better way. First we'll need the following set up: a bottle of alcohol, a small pan, and of course our Borde stove:


Next, we'll undo the plug in the end of the stove and add white gasoline (Coleman type fuel). We'll then tighten the plug firmly using the flattened end of the wire stove holder.


Now, we'll place the little pan under the coils of the stove, fill the pan with alcohol, and ignite the alcohol. Since the pan is at an odd angle, it won't hold a lot of alcohol, so I went ahead and primed the stove twice (aka a double prime).


After double priming, I open up the burner just a bit allowing the now vaporized gasoline to flow out of the burner. Here, the Borde stove is just warming up:

The pot stand I'm using in the above photo is an aluminum US GI cup stand. It works, but I generally wouldn't recommend a GI cup stand for use with the Borde stove. The top of the burner plate should be about 3/4" (2 cm) from the bottom of pot you are heating. A GI cup stand is simply too short to provide the appropriate clearance.

Here, I'm heating water for my morning tea.
 
A word of caution:  Since the burner is directly attached to the fuel tank, the Borde stove gets hot.  Always pick up or move the stove by the wire holder.  It should be noted that the Borde stove has no safety devices of any kind whatsoever.  Overheat this stove, and it will explode.  Indeed, the nickname of this stove is the Borde Bomb, although some claim that the nickname derives more from the method of priming than the way in which the stove operates.  The plug at the base will sometimes fail first, but the plug failing first may not always happen.  In short, you are the safety device.  It is up to you to turn down the stove if it seems to be surging too powerfully.  You must be mindful at all times of how the stove is sounding and performing.

I'm not completely sure when the Borde stove was created.  I've seen several patents taken out by Josef Borde in the 1940's and 1950's.  Somewhere in that time frame the stove that we know today was developed.  There have been multiple variants of the stove, including versions where the burner is mounted on top of the tank rather than at the end, but generally all of the stoves are considered the Borde stove.  
My information is a little bit sketchy, but apparently the Borde stove went out of production some time in the mid 1960's until production was resumed some time later by Norbert Bader.  Alas, the most current information that I have is that the aging Mister Bader has discontinued production again, perhaps this time for good.

OK, let's finish up now with a couple of flame shots.


Thanks for joining me on another Adventure in Stoving!


HJ


The Borde Stove

What's good about it
Super high cool factor!  :)
Compact
Extremely simple
Relatively light

What's bad about it
Hard to find
Expensive
No longer in production (parts hard to find, no factory repairs available)

Small capacity tank
No integrated pot support
No safety devices.

Friday, February 4, 2011

Stove of the Week: MSR WindPro

Stove of the Week: MSR WindPro

This week's stove is the MSR WindPro.


The WindPro is a remote canister stove, meaning that the stove uses a canister of gas that is attached to the stove via fuel hose rather than being directly attached to the stove.  Here you can see the stove and the gas canister as well as the fuel hose that connects them.


What's that you say?  You think the WindPro looks just like last week's stove, the Simmerlite?  Well you're right about that (Simmerlite, top; WindPro, bottom).


But take a look at the connectors.  That's what distinguishes the two.  The Simmerlite runs on white gasoline, a liquid fuel, and the WindPro runs on canister gas.


So, what's the big deal about it being a remote canister stove?  Well, on the more common upright type of canister stove, the burner mounts directly on the canister.  In other words, you have a very hot flame very close to a very flammable gas.  If you use a windscreen around the burner, you will deflect heat toward and trap heat around the canister.  Heat + flammable gas = bad.  Very bad.  Generally it's not a good idea to use a windscreen with an upright type canister stove unless a) you really know what you're doing and b) are extremely diligent about constantly monitoring the temperature of the tank via the "ouch" test (if the canister is hot enough to make you say "ouch," that's WAY too hot; TURN IT OFF IMMEDIATELY).  If you don't have a wind screen around your stove, on a windy day you could quite literally go through an entire tank of gas without ever bringing a pot of water to boil.  

Enter the remote canister stove.  If you put a windscreen around the burner, the canister, which is some distance away, will not be affected.  In fact, since the windscreen is between the canister and the flame, it's not only OK to use a windscreen, it's actually safer to operate the stove with a windscreen.  A windscreen not only makes your stove more efficient it also protects the canister.

Note in this photo how the windscreen sits between the canister and the burner, protecting the flame AND protecting the canister.


Add to that the fact that remote canister stoves have a much lower center of gravity and tend to be much more stable.  Particularly with a larger pot on top of a small canister stove, the arrangement can be quite "tippy," and your dinner may wind up spilled.

So, why doesn't everyone just use a remote canister stove?  I mean who wants to waste gas that they've just packed up a mountainside or risk spilling their dinner?  Well, first there's the up front cost.  Remote canister stoves can often be double the price of upright canister stoves.  Second, there's the weight.  An upright canister stove uses the canister itself for support; it has no legs.  Also, an upright canister has no hose.  The hose and legs of a remote canister stove all add weight.  Upright canister stoves are typically much lighter than remote canister stoves.  Then lastly there's compactness.  The legs and hose of a remote canister stove take up space.

In short, as in much of life, which stove is the better stove is a series of trade offs.  Which stove is the better stove for a given individual or a given use depends largely on the style of that individual, the conditions (wind, weather, elevation, etc.), and on the way in which the stove will be used.

For larger groups (and therefore for larger pots), the more stable remote canister stove is the better choice.
For areas prone to wind, a remote canister stove is the better choice.
For smaller groups or soloists, an upright canister stove will work just fine.
For those on a budget, the upright canister stove is the logical choice.
For fair weather, why not just take a lightweight upright canister stove?  Why carry more than you need?

But before you make your decision, there's yet another advantage to a remote canister stove, a big advantage: liquid feed mode.  First, let me be clear:  Not all remote canister stoves can operate in liquid feed mode.  In order to function properly and safely, a gas stove must have vaporized gas (not liquefied gas like the gas in the canister).  In liquid feed mode, to turn the liquefied gas in the canister into vaporized gas, a stove must have a generator (aka a "pre heat loop").  The generator is an area where liquefied gas is exposed to high heat such that the liquefied gas vaporizes (turns from a liquid into a gas).  If your remote canister stove does not have a generator, do not attempt to feed it liquefied gas.

How do I know if my stove has a generator?  Take a look at this photo.

Note the silver colored tube that proceeds from the left side of the burner around the front of the burner and up the right hand side of the burner.  This is the generator. 
 
Now, take at look at the top left side of the burner in the above photo.   If you look closely, you can see the generator, and you can see that the flames from the burner are actually hitting the generator.  Needless to say, the liquefied gas flowing through the generator is being exposed to high heat and does vaporize.

Well, that's very nice, but why should I care that I can use liquid feed mode?  Answer:  Cold weather.  Your stove needs vaporized gas.  In cold weather, gas doesn't vaporize properly.  In liquid feed mode you rely not on the weather but on the flame to vaporize your gas.  In other words, you can get the vaporized gas your stove needs even in weather that is quite cold.  Depending on the design of your stove, you may be able to operate your stove in liquid feed mode in temperatures down to -10F/-23C.  By contrast, an upright canister stove isn't much good in temperatures lower than 20F/-6C.  

Well, this liquid feed mode sounds very interesting, but as a practical matter, how do I go about it?  Well, you invert (turn upside down) the canister.  After inversion, the valve is at the bottom of the canister, and the pressure in the canister forces liquefied gas out the bottom of the canister.  Before you start, it's best to put something heavy (like a pot of water) on the stove so the stove won't tip over as you invert the canister.  The recommended way to use a stove in inverted canister mode is to start the stove in normal mode, let the stove get hot, turn down the flame to low, and then invert the canister, keeping the canister low the entire time.  The stove will surge a bit when you invert the canister because of the physics of a liquid turning rapidly to gas.  Keeping the canister low and turning the flame down low help keep the surge to a minimum.  Leaning the canister against something will keep the canister inverted (see photo).


Now, here's our WindPro, happily chugging away in inverted canister mode, and, as you can clearly see, she has handily passed the "tea test."


Ah!  I see that breakfast is served, so you'll have to excuse me.


I thank you for joining me on another adventure in stoving.

HJ

Some summary information:

What's good about it?
For a remote canister stove, it is light and compact.
It has a generator (pre heat loop) so it can be used in inverted canister liquid feed mode.
The fuel hose is long and flexible which facilitates using the stove in inverted canister liquid feed mode.
It's perfectly safe with a wind screen.
In liquid feed mode, it will work well in low temperatures, perhaps even subzero temperatures.  Note:  I'm not trying to be wishy-washy.  I just haven't done the field testing needed for me to feel confident in proclaming this a viable option in subzero weather.  
It's a canister stove.  Gas is really convenient.

What's bad about it?
The WindPro uses relatively heavy steel canisters.  Lighter canisters like the Powermax canister are available.
As with all canister stoves, you have the problem of what to do with empty canisters.  In some places there are some recycling programs, but recycling is not environmentally free.  There is some cost to the environment for delivering gas in convenient little canisters.
Inverted canister mode is a little "fiddly."  There are other gas stoves specifically designed for liquid feed mode that you don't have to fiddle with as much.
The pot supports are a little slidey.  They could be a little more grippy.

Overall, the MSR WindPro is a good light weight winter capable stove.

Types of Gas Canisters

Article revised Nov 25 2011.

First, there are six main types of gas canisters out there, only four of which are really appropriate for use in backpacking.  The six are:
1.  The heavy steel, typically green, Coleman type 16.4 oz/465g 100% propane canisters.  These are great for car camping, but are generally too heavy and bulky for backpacking.
2.  The tall steel cylindrical canisters that look like a traditional can of hair spray.  These canisters contain, typically, 100% butane. These canisters are frequently used by the restaurant industry, particularly for tableside cooking.  These "long" butane cans have a "bayonet" connector that protrudes out of the canister's valve.  This "bayonet" is exposed and therefore vulnerable to accidental discharge or damage.  These to my mind have an inferior connector that is not robust enough for back country use although in some areas people do use them, particularly in Asia.  They are cheap, I will say that for them.

OK, so the first two really aren't for backpacking.  Let's get to the backpacking appropriate ones:
3.  The dome shaped canisters with a threaded connector.
4.  The dome shaped canisters with a smooth connector.
5.  The dome shaped canisters with a dimple in the top.

The dome shaped canisters with a threaded connector are the standard canister for backpacking in the US, UK, Australia, Canada, New Zealand, and Japan (and probably a few other places).  They're not unknown elsewhere, but they're not necessarily standard.

The dome shaped canisters with a smooth connector is the Camping Gaz type connector.  This is the standard in Europe.  Other types of canisters may be available, but they generally won't be as easy to find if you can find them at all.

The dome shaped, backpacking packing canisters with a dimple in the top are an older type of canister but are still the standard some areas including many parts of Eastern Europe, South America, the Middle East, and Africa.  These are piercable canisters.  The stove has a sharp piece of metal on it.  When you attach the canister to the stove, the sharp piece of metal forces itself through the top of the canister, puncturing a hole in the canister.  The canister is then locked into place.  Once the canister is attached to the stove, you cannot remove it until it is empty (unless you want flammable gas spewing everywhere).  This type of canister has been blamed for a number of accidents, and many countries have banned or have tried to ban them.  This type of canister is not recommended.  If the canister connection works loose, you could have a real disaster on your hands.  Avoid this type if you can, but be aware this is all that is available in some localities.

6.  Lastly, there is the Coleman Powermax canister.  This is a cylindrical, silver colored canister.  One end of the canister is rounded and has a non-threaded connector on it.  If you look closely at the connector, you'll see that the connector is hexagonal around the middle.  These canisters are actually a better canister than the standard dome shaped canisters, but they are not as widely available, particularly outside the US.  In addition, they require a specialized stove that has a matching connector.  These canisters will work in all conditions but are especially good in cold weather because they are liquid feed canisters.  Update November, 2011 on Powermax Canisters


See my earlier post on Winter Gas Choices for more on liquid feed gas stoves.

As I'm sure you've realized by now, not all canisters are available in all places, and in many areas no canisters of any type will be available.  If you plan to use your canister stove when you travel, do your homework.  Make sure the canisters you need are available in the area you are going to.

Generally all of the threaded dome shaped canisters are interchangeable.  Yes, I know that MSR says you should only use MSR canisters with MSR stoves and that JetBoil says you should only use JetBoil canisters with JetBoil stoves.  That's a bunch of bull.  They're interchangeable.  Maybe you'd have some problems if you bought some cheap brand in a remote country, but all of the ones sold here in the US have a standard 7/16ths UNEF thread and are interchangeable.  Where I live, Snow Peak is generally the cheapest and Coleman is generally the most expensive -- except at Walmart where Coleman gas is a real bargain at $4.88 for the 7.5oz canister. The brand you get for warm weather use doesn't make much difference.  I usually buy whatever is cheapest.

Caution!
The newer orange label Coleman canisters do not work with many brands of stoves.  The older green label Coleman canisters typically have worked fine.

I've now broken out my discussion of which brands are best for cold weather into a separate post.  Please see What's the Best Brand of Gas for Cold Weather?  for further information.

HJ

Related articles and posts: